Auto Website Deployment via Vercel Deploy Hooks
Netlify Build hooks are URLs you can use to trigger new builds and deploys. You can find them in Site settings > Build & deploy > Continuous deployment > Build hooks.
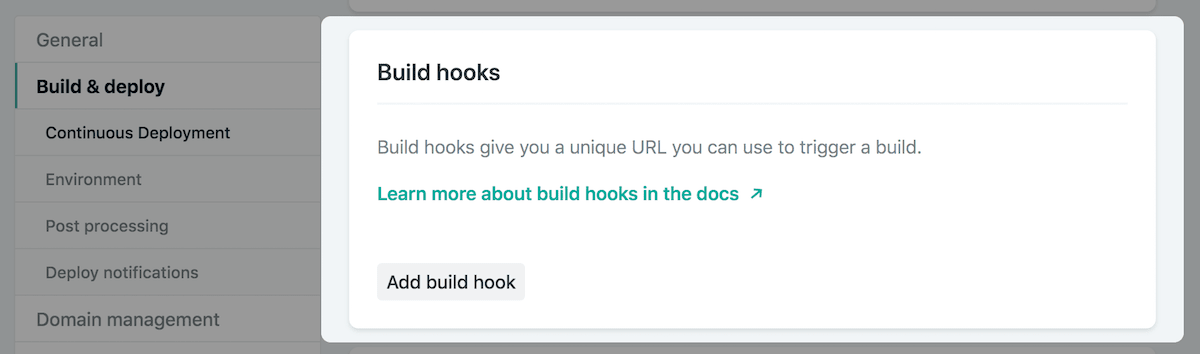
To add a new build hook, select Add build hook. The name of the build hook will appear in your list of build hooks as well as in the default deploy message
for each deploy triggered by the hook.
By default, choose a branch to build. This list will only include branches that have been deployed at least once.
Netlify will provide you a unique URL for the build hook after you save your build hook settings. You must send a POST request to that URL to activate this hook.
This POST request will most likely be issued by a service you want to integrate with Netlify, but you can also send it yourself.
You can, for example run a curl command from your terminal:
curl -X POST -d '{}' https://api.netlify.com/build_hooks/5c23354f454e1350f8543e78
Builds must be active for build hooks to trigger builds of your site.
Parameters
Build hooks accept the following optional URL query parameters to alter the behavior of the triggered build:
trigger_branch: parameter that specifies which repository branch the build will use. If the branch does not exist in your repository at the time of the build, the build will fail, with an error message in the build log.trigger_title: parameter that specifies a title to replace the default deploy message in your site deploy list.
Here is an example build hook URL using both available parameters:
https://api.netlify.com/build_hooks/5c23354f454e1350f8543e78?trigger_branch=testing&trigger_title=triggered+by+This+Awesome+Service
This would trigger a deployment from an existing branch called testing , with a custom message: triggered by This Awesome Service.

Payload
You can send a custom payload in your build hook POST request. The contents must be passed as a string, which will be URL-encoded and made available
in the triggered build as an environment variable.
You can access it in the build by using the variable INCOMING_HOOK_BODY.
Add the Webhook in Apito
Finally, add a webhook in the Apito Console using the url that you have build. To create a webhook you have to go to Settings in Apito Console then Webhooks from the left
navigation bar and click Create a Webhook
You have to fill in:
NameName of the webhooksModelThe model that the webhook will reflect toOperationChoose from which action you would like to trigger the webhook forWebhook URLThe Gitlab Pipeline Trigger URL
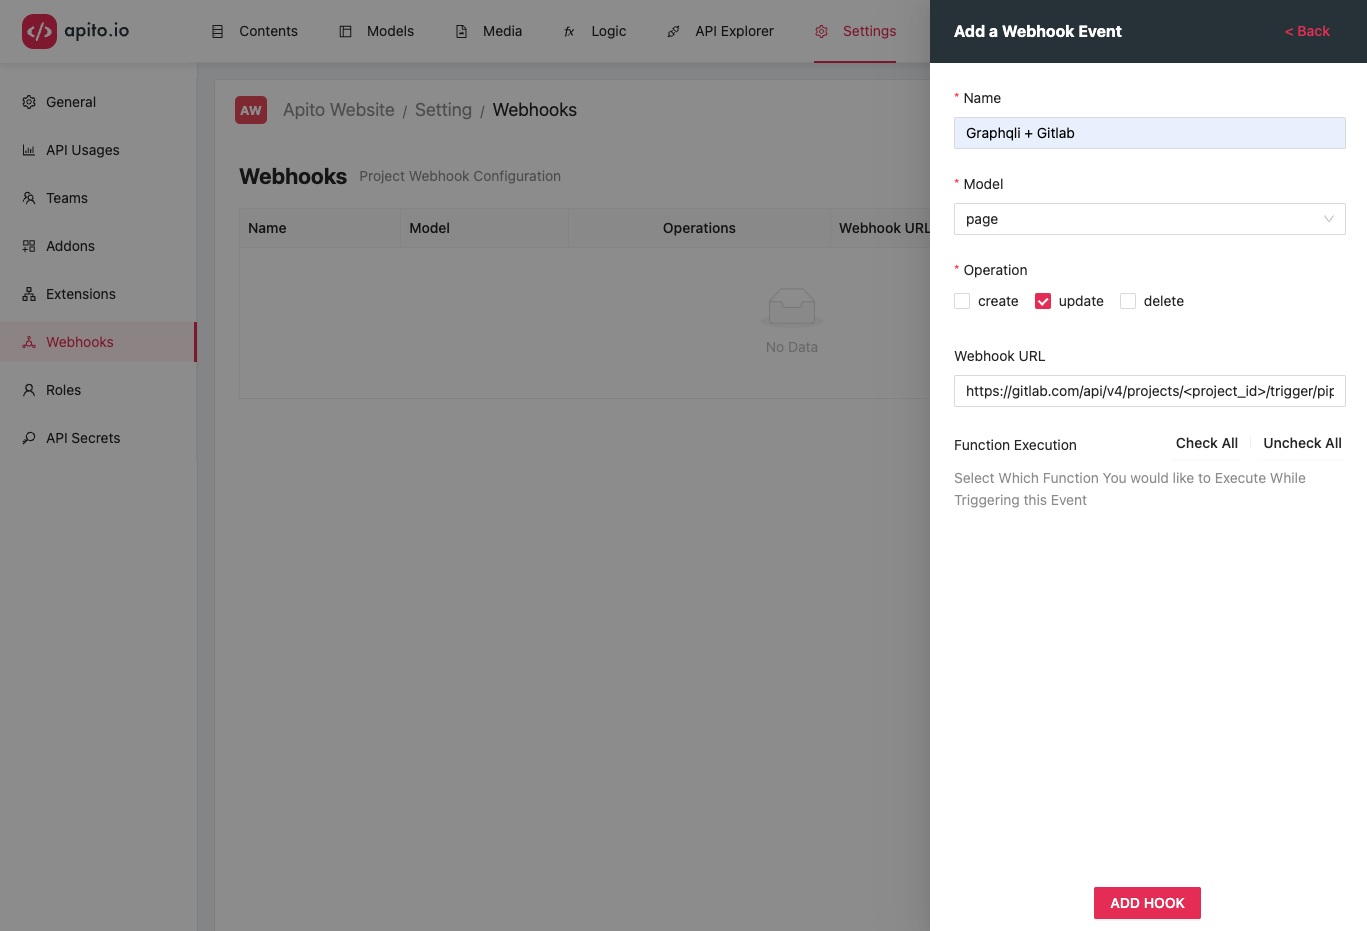
Click on the CREATE HOOK to create your trigger hook. Now each time your model updates, in this example page updates it will send a POST trigger to the URL with the page data
in the request body as json.