Auto Website Deployment via Gitlab Pipeline Trigger
If you are using GitLab for your website or project repository, and you have your pipeline setup via .gitlab-ci.yml, then you can use Apito’s API management platform webhooks
to auto trigger GitLab CI pipeline whenever your database API data changes through our instant API builder.
First go to your project Settings > CI/CD and click on Pipeline triggers and create a trigger.
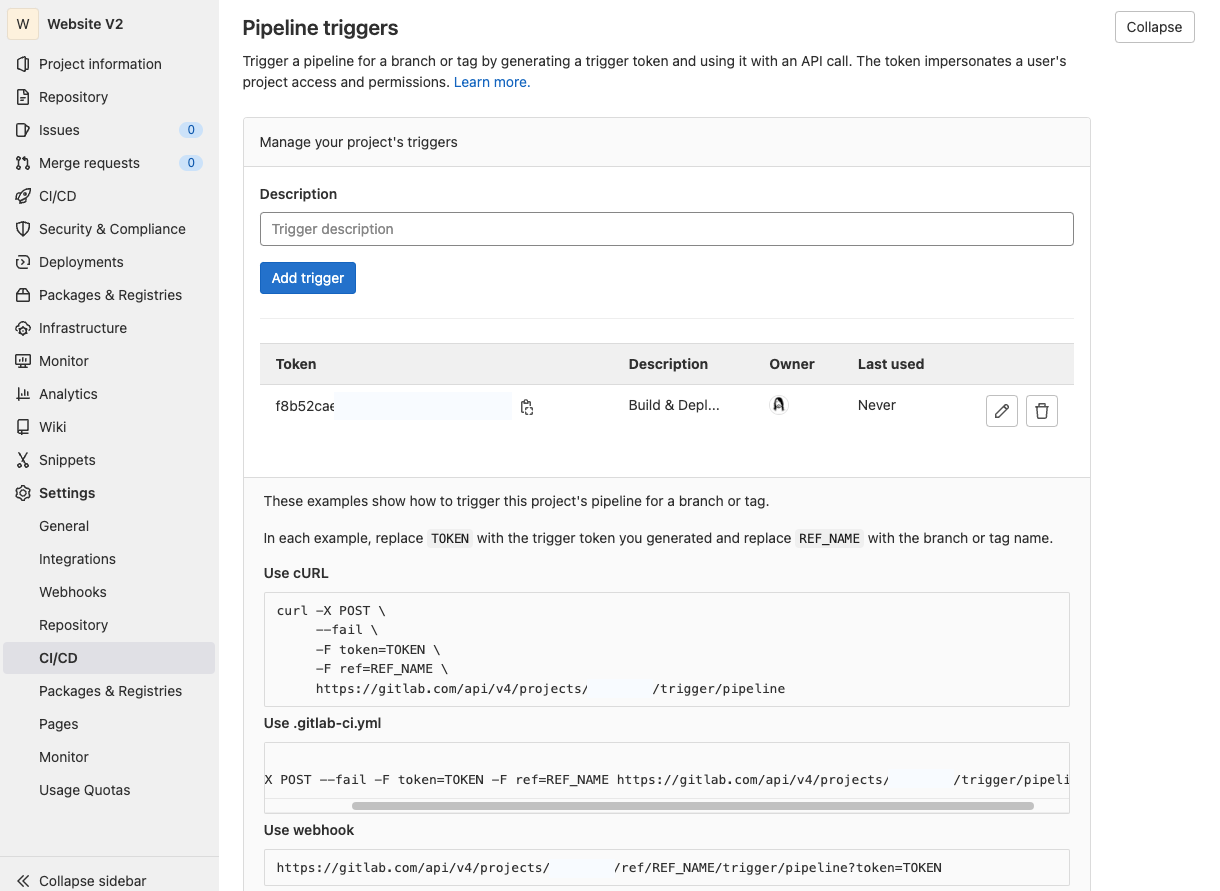
A Gitlab Pipeline trigger url looks like this,
https://gitlab.com/api/v4/projects/<project_id>/trigger/pipeline?token=<token>&ref=<ref_name>You have to replace:
<token>with your trigger token.<ref_name>with a branch or tag name, likemainormaster.<project_id>with your project ID, like123456. The project ID is displayed at the top of every project’s landing page.
Add the Webhook in Apito
Finally, add a webhook in the Apito Console using the URL that you have built. Our build API tool makes it easy to create webhooks that integrate with GitLab. To create a webhook you have to go to Settings in Apito Console then Webhooks from the left
navigation bar and click Create a Webhook
You have to fill in:
NameName of the webhooksModelThe model that the webhook will reflect toOperationChoose from which action you would like to trigger the webhook forWebhook URLThe Gitlab Pipeline Trigger URL
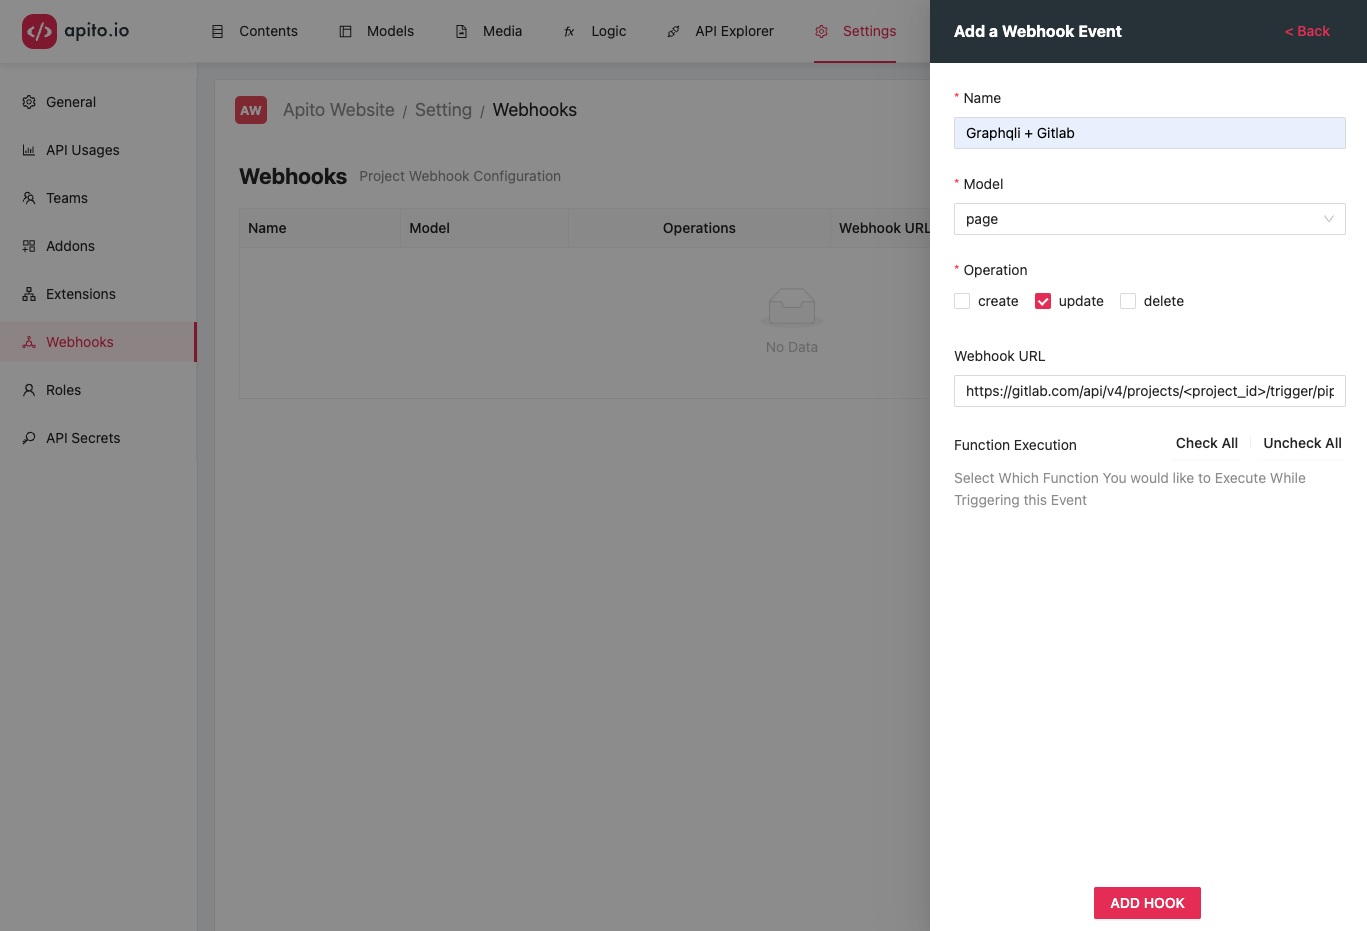
Click on the CREATE HOOK to create your trigger hook. Now each time your model updates, in this example page updates it will send a POST trigger to the URL with the page data
in the request body as json.